Pages

Tuesday, September 30, 2014

Quick Easy 25 min Homemade Chili


This is a go to recipe for our family! We love chili but just flat out don't have the time to do all that soaking the beans etc that a traditional chili would take. This recipe is adapted from a cooking genius friend of mine who taught me a lot of domestic things in my earlier years whom will forever be thankful for!! 

Quick and Easy 25 min Chili
3lbs ground meat 
(we used chicken we had ground ourselves but hamburger or turkey works great too!!)
1 onion diced
2 cloves diced garlic or to taste
4 cans of chili beans undrained
1 15oz can of tomato sauce
2 TBS cumin or to taste
1/2 TBS chili powder or to taste
2 tsp liquid smoke
1/2 tsp chipotole powder
6 drops Tabasco or to taste
salt and pepper to taste
grated cheese for garnish

Brown meat with onion and garlic until meat is no longer pink and onion is translucent. Drain if it is needed. Add chili beans and tomato sauce. Add all seasonings to taste. :) Serve with a little cheese on top. PS this makes a huge pot,  Feel free to adjust the amounts to fit your needs.

Monday, September 29, 2014

Asian Inspired Salad

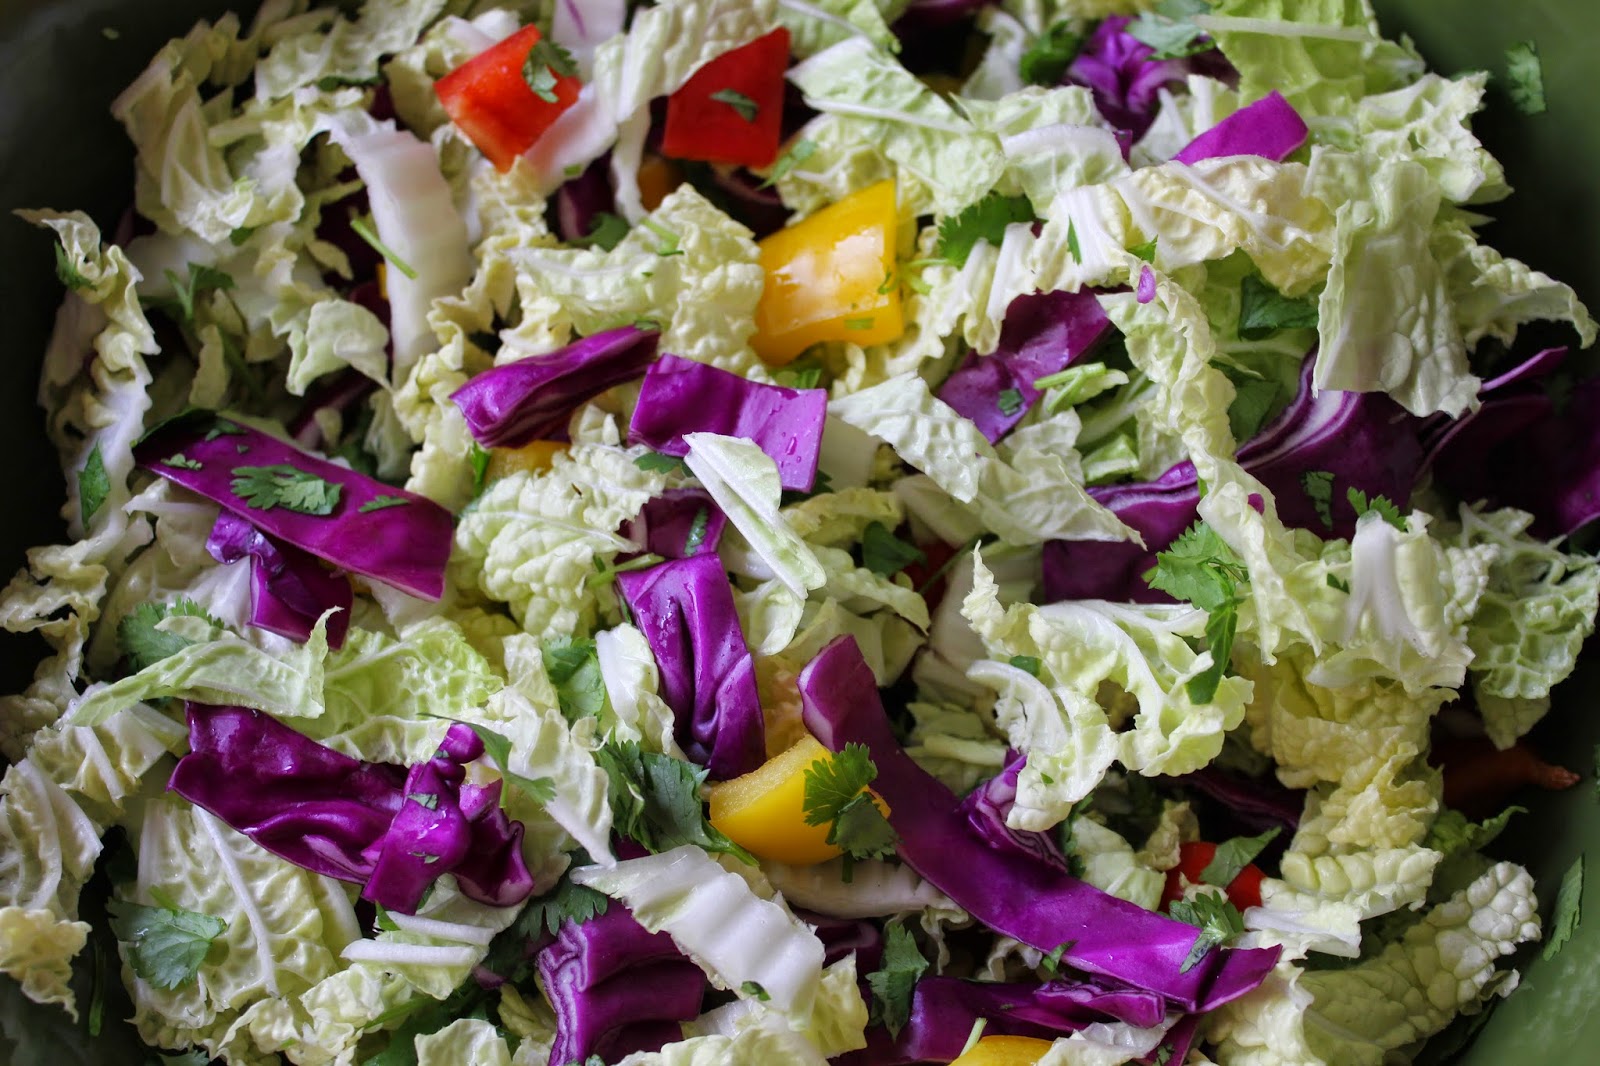
I am one of those people that loves salad once I am eating it but I rarely go out and choose it. You know what I mean? We had dinner with some friends the other night and she made this awesome asian-esque salad to balance the ribs she made. The tang really cut the fat of the ribs in the perfect way. It was delicious!! So the next day I made my own version. 


Mmmmm, right? So pretty!

Asian Inspired Salad

Salad:
1/2 head Napa cabbage
1/4-1/2 head of red cabbage 
1 yellow pepper 
1 red bell pepper 
2 cups sugar snap peas
1 bunch cilantro

Dressing:
1 tbsp sugar
1 knuckle ginger
3 cloves garlic
1-3 tbsp soy sauce
1/2-1 cup sesame oil
1/2-1 cup rice wine vinegar

Chop all the salad ingredients into bite sized pieces and mix in a large bowl. For dressing put garlic and ginger in food processor and chop until fine. Add all other dressing ingredients and blend until combined. Pour dressing over salad greens and serve immediately. 


*this salad lasts in the fridge without the dressing on it for a couple days. Just throw a moistened paper towel over the top and store. 
*chopped up rotisserie chicken is awesome in this salad
*ingredients in dressing are to taste. I use more like a thumb sized piece of ginger because we love it so much.


Friday, September 26, 2014

Eyeball Wreath-A Halloween Craft Tutorial

I saw this idea on pinterest and when I found the Halloween colored googly eyes at Michael's it became a must do! 
I think it turned out so cute!  Here is what I did.....

YOU WILL NEED

1 14 inch wreath form


6 yards approx of 1.5 inch white ribbon

 (if you spring for the white form you might not need the ribbon)

90 ping pongs


90 googly eyes
a low temp glue gun 
low temp glue sticks
First I enlisted my Gabby Girl (hey many hands make for light work) and as she glued the googly eyes onto the ping pong balls, I wrapped the wreath with the white ribbon. Once the ribbon was wrapped and glued to the wreath form, I glued the ping pongs onto the wreath fitting them as close as I could to each other. I did find that it was necessary to hold some of them on long enough for the glue to cool or they would slide down but other than that this is a straight forward easy fun Halloween craft!!


Give it a shot!!
LOVES
Emily


Thursday, September 25, 2014

Freezer Meals

During the holiday season this year I get the privilege of working six days a week. Boo. So when I have time off the month of december I want to be having fun with the kids and not stressing out about dinner. I am wanting to avoid the drive thru as much as possible as well. So my goal is to have 6-10 meals in the freezer by then. Realistically 6 but my ultimate goal would be to have 10. It all depends on how time and budget go between now and then! I found this great article with tips on how to freeze meals. It was really pretty helpful. The only tip that I would add is if you don't have time to thaw your meal in the fridge you can put it in the oven as it is preheating and it will thaw a bit. Do this especially if you freeze your food in glass. Frozen glass+hot oven=a big explosion. That would not be fun! To save yourself just stick it in the fridge first thing in the morning. Oh one more thing! I am thinking of investing in a food saver to make my meals really air tight. No freezer burn for us! 

I am sharing two of my favorite meals for freezing. Baked Pasta 2.0. Which is a lot like the other baked pasta dish that I posted a while back. I am sharing Tater Tot casserole too. That is a family staple!  


Baked Pasta 2.0

1 pound medium shell pasta
1 pound Italian sausage
1 pound mozzarella cubed
1 jar spaghetti sauce
1 pound ricotta cheese

Boil pasta. While pasta is boiling brown sausage. After ever thing is cooled to room temperature mix all ingredients and pour in pan. You want everything cooled to room temperature before you freeze to prevent food poisoning! When ready to bake put in oven and preheat to 350 degrees. Bake one hour if frozen and 30-45 minutes if thawed. 


I put a layer of freezer paper over the food before I freeze. It helps to make things not stick. Make sure you remove the freezer paper before you bake! It has plastic on one side and that would be bad. Then a layer of foil goes over that. Then wrap as much as possible with plastic wrap. If you have a food saver you can forget all that and just use the food saver. Which I will be investing in! You want it air tight! Otherwise you will get freezer burn which won't hurt you but it tastes disgusting. 


Make sure to clearly label what your dish is and when it was made. It is only recommended to keep casseroles for 2-3 months in the freezer.


Tater Tot Casserole

2 pounds ground turkey
1 medium onion
1 large can cream of mushroom soup
1 pound bag tater tots
3-4 cans green beans
2 cups shredded cheddar cheese

Brown turkey on sauce pan. Add onion and cook until translucent. Turn off heat and add cream of mushroom soup. Let cool to room temperature. In 9x13 pan put a layer of tater tots. Then add layer of green beans. Then layer with meat mixture- you may need to thin a little with milk. At this point you can get it ready to freeze just like for baked pasta 2.0. Do not add cheese on top if freezing. Cheddar cheese can get a little weird when you freeze it. When going to bake from frozen add the cheese the last 5-10 minutes of cooking time. If cooking immediately add cheese on top. Bake at 350 for 45 minutes if thawed, 60-75 minutes if frozen. 


MMMM layers! What meals do you make and freeze? I need more ideas! It feels good having a couple down. I will be posting more over then next few months so stay tuned! Any suggestions for meals? Is asking that twice too much? HA!

Peace out- AnneMarie

Wednesday, September 24, 2014

Pantry Bag Meals-A freezer Meal For those who don't have a freezer


I love a good freezer meal. I enjoy the peace of knowing that dinner is planned, prepared, and ready to go! What if one does not have a freezer or freezer space? No worries! There is a solution...
Pantry Bag Meals
This method only requires the space for the pre-cooked meat in the freezer and then when its time for dinner the rest of the ingredients are set a side ready to go. Just follow the simple instructions heat and eat. COOL!!  I have 12 recipes developed so far and 2 to share with you today. 

First is 
Taco Soup
Shopping list

1 lb hamburger or turkey burger
 1 onion, chopped
 1 (16 ounce) can chili beans, 
 1 (15 ounce) can kidney beans 
 1 (15 ounce) can whole kernel corn, 
 1 (8 ounce) can tomato sauce
 1 29oz can peeled and diced tomatoes
 1 (4 ounce) can diced green chile peppers
 1 (1.25 ounce) package taco seasoning mix

What to do

1. Precook the burger and onion drain and put in a freezer safe container and freeze.
2. Gather the canned goods and put in a bag or a different container of your choice
3. On the outside of the bag/container write or staple a printed sheet with these instructions....
Add 1 lb burger w onion from the freezer in a soup pot
Mix all the ingredients from the bag in with the burger, (do not drain the cans) add 2 cups of water. Heat through and eat!! 

(BTW we love to eat this soup with crushed tortilla chips and a little cheese sprinkled on the top)

The second is 
Hearty Bean Dip
(this recipe makes a great dip for chips or a filling for tortillas. Don't let the word Dip confuse you. It is hearty enough to make a meal. I promise.

Shopping list
1 lb burger
1 jar of your favorite salsa
1 large can of refried beans
1 lb cheese
Corn chips or tortillas or both :) 

PS the cheese, corn chips, and tortillas do not need to be purchased until you are ready to eat the recipe

1. Precook the burger, drain, and put in a freezer safe container and freeze.
2. Gather the canned goods and put in a bag or a different container of your choice
3. On the outside of the bag/container write or staple a printed sheet with these instructions....

Place 1 lb burger from the freezer in a pot, add salsa and beans and cheese from the fridge. Heat through. Serve with extra cheese sprinkled on top and corn chips or tortillas as a filling. 


These babies are going to waiting and ready for my family this coming holiday season! I've got 10 more recipes to get ready for my pantry and for you to see! Be watching!

ENJOY!
Loves,
Emily


Tuesday, September 23, 2014

Pumpkin Planter

It is fall!! YAY! I love the colors, smells, tastes and sites of fall. I love the cool days and crisp nights. Oh fall, you so pretty. I thought with it being the first day of fall that a fun DIY was in order. A pumpkin and mum DIY. So check it out! 


A pumpkin planter! It is crazy easy and so beautiful. The colors of those mums with the orange of that pumpkin is just lovely. It is a little bit of a bummer because it is temporary. Eventually the pumpkin will rot. However, I don't mind that because fall is temporary too! Lets throw caution to the wind and enjoy it. 


The supplies you need are:
One pumpkin
One to two mum plants- I did two because they were pretty small and my pumpkin was pretty good sized.
Carving knife
Spoon for scraping out the innards of the pumpkin
Bowl or pan to gather the seeds
Spray bottle with half bleach and half water
Potting soil


Cut a big hole in the top of the pumpkin. Make the hole bigger than you would for a jack-o-lantern. It needs to be big enough to easily plant your mums. Use the spoon to scrape out all the innards of the pumpkin.  


Super clean! The cleaner the inside of your pumpkin the better. 


Flip your pumpkin upside down and cut a drainage hole. You can do this with a drill but I just used the knife to cut a hole. 


This next step is important! Spray the inside and out of your pumpkin with your bleach mixture. Really wet it down. Then let it dry thoroughly. The bleach solution helps to preserve the pumpkin so it takes longer to rot. 


Now plant your mums. Fill the bottom of your pumpkin up a bit with soil and then put your mums with the root ball fully attached. I shoved two little mums in my pumpkin. Then I  had to use my hands to put dirt in all the crevices. Make sure you don't tamp down the soil. You don't want it tight! It will last longest in a cool place.  


Now enjoy your temporary but beautiful pumpkin planter. This would make a great centerpiece for a party. I will post updates of how it is holding up over the next few weeks. 

Peace Out- AnneMarie 

Monday, September 22, 2014

No oil pumpkin chocolate chip cookies

SO these little babies are not pretty. They are sometimes so ugly that my kids have decided to call them pumpkin dookies if you catch my drift but they are tasty easy and are a little bit more healthy than your every day pumpkin cookie.  

PUMPKIN CHOCOLATE CHIP COOKIES (DOOKIES)
1 box of carrot cake mix
1 small can of pumpkin puree
1 bag of chocolate chips (or less if you are watching your sugar intake)

Preheat oven to 350, spray a cookie sheet or line with parchment paper. Mix all the ingredients together. drop on the sheet and bake in a pre heated oven for 15-20 minutes.  
THE END
Pretty easy!!

Friday, September 19, 2014

The past few weeks!

We have done some fun posts the last few weeks! Check them out so you don't miss out!

Black bean and yam enchiladas. They are vegetarian! And perfect for meatless Monday


Deconstructed chicken pot pie. Not only perfect for a cool fall evening but they would make a splash when entertaining.


Polka Dot Pumpkins! Yay Halloween is coming!


A sweetheart journal has got to be one of the most romantic things you can do with your partner ever. Nick and I are going to start one!


Pinterest buster- lemon zucchini bread. Lackluster looks but super yummy taste!


Getting organized for Christmas. It is three months away! AAAHHHH! I am not prepared.


Easy bread machine rolls. Takes all the work out of it! I love it!


My first I love my state post. The first of many!


Thursday, September 18, 2014

Black Bean and Yam Enchiladas-A great recipe for meatless monday!


I found this recipe from the wonderful shrinking kitchen! She has super duper, healthy recipes and you should totally check her blog out! Click here!! we love Black Bean Enchiladas at our house! Especially the homemade enchilada sauce! Wonderful and no stuff I can't pronounce in it! Yay! Totally meatless too. Sweet! 

Here's the recipe!!

Black Bean and Yam Enchiladas
2 tablespoons olive oil
5 tablespoons chili powder
4 tablespoons flour
2 15 ounce cans of tomato sauce
3 cups lower sodium chicken broth 
1 1/2 teaspoons garlic powder
1 1/2 teaspoons onion powder
1/ t2easpoon salt
2 1/2 teaspoons cumin
3 cups of the enchilada sauce
2 tablespoon olive oil
1 medium onion, diced
2 cups yam, cooked and mashed
2 15 ounce can black beans, drained
1 cup shredded sharp cheddar cheese
18 small corn tortillas

To make the Enchilada Sauce
In a large sauce pan, heat oil over medium heat. Add chili powder and flour whisking constantly to combine. Mixture will be a thick paste (roux).
Slowly add in a small amount of tomato sauce whisking until the roux has dissolved.  Once the roux is combined, add the rest of the tomato sauce and chicken broth. Whisk to combine.
Add in the rest of the spices, stir to combine.
Bring to a boil, reduce heat and simmer for 15 minutes.
Remove from heat and use in your enchilada recipe, or cool and divide into containers for storage.

For the Casserole
Preheat the oven to 350F.
Heat the olive oil in a skillet over medium heat.
Add the onions, saute until tender, about 3-4 minutes.
Remove the onions from heat and throw in the beans and the yam. Mix well.
Measure out 3 cups of the enchilada sauce you just made. Set the rest aside - it freezes well. Save it for your next batch!
In a 9x13 baking dish, lay out six of the corn tortillas. You may need to tear one up - you just want to make sure you're covering the bottom of the dish.
Spoon some of the enchilada sauce onto the tortillas and spread around.
Dot 1/2 of the bean/yam mixture over the tortillas and sauce, then spread as evenly as possible.
Sprinkle 1/2 of the cheese over the bean/yam mixture.
Repeat the layers EXCEPT the cheese.
To finish, do the final layer of tortillas, then pour the remaining enchilada sauce over the top.
Sprinkle with the remaining cheese.
Bake for 25 to 30 minutes, until bubbly.
Let cool for about 10 minutes before serving.
PS only 239 calories per serving!!

LOVES!!
Emily

Wednesday, September 17, 2014

DIY gift round-up

Is it way too early to be thinking about Christmas gifts? Christmas is only like three months away! Three months. So really it is perfect timing, especially for doing handmade gifts! As a matter of fact I was hoping to DIY some little gifts for the ladies I work with. Below are a few that I found that I love. There will be other posts like this in the future because there are a whole lot of great tutorials out there. And I am crazy indecisive! 

Soap on a rope from A Beautiful Mess


Tiny neon pots from I Spy DIY


Cute jewelry dishes from I Spy DIY


DIY tea bags from Miss Renaissance


Instant Mocha mix from Something Turquoise. Although cocoa would probably be more my ladies style. 

DIY sugar scrub cubes from Rustic Escentuals

Those are just a few of a million different choices. What would you recommend? What are your favorite gifts? Maybe a Starbucks gift card will be the gift of choice!