Pages

Showing posts with label yum. Show all posts

Thursday, January 15, 2015

Orange Honey Butter

Have you ever had Indian Fry bread? Or what Utahns call scones? It is just fried dough. Like thin stretched out bread dough that has been fried to golden perfection but whatever. We love it around our house. Even the kids eat it up. There are crazy easy to make too. As a matter of fact all I do when I make them is use rhodes rolls that have been thawed. No bread dough making for me! The best thing about them is that they are a blank slate. You can use them for something more filling like navajo tacos or just sprinkle them with some powder sugar.  


For a fun twist I made some orange honey butter. Holy bananas it was delicious! 

Orange Honey Butter

1/4 C butter, thawed to room temperature
1-2 Tbsp powdered sugar
1-2 Tbsp honey
6-8 drops doterra wild orange oil
1-2 tsp vanilla paste

Whip honey and butter until pale in color. Add sugar, orange oil, and vanilla paste and whip until well combined and a consistency that you like.


So all my measurements are to your taste. Some people like it more sweet, others like it less sweet. We liked it sweet. Make sure your butter is really room temperature. If it isn't room temperature the butter and honey have a hard time combining. 

Peace Out!- AnneMarie

Tuesday, December 16, 2014

Butter Pecan Raisin Bread Pudding!


My Hubby and I have a favorite dessert that we may or may not sneak away to a certain Famous restaurant to order and share. It is their yummy  BREAD PUDDING! Now...I have had my share of bad bread puddings too. Some that are some slimy and so squishy that they are not enjoyable at all. I am happy to announce that this recipe is AWESOME!! Its nice firm but still soft if ya know what I mean...HAHA!!

BUTTER PECAN RAISIN BREAD PUDDING

 1/4 cup butter, melted
 2 cups half-and-half
 2 cups milk
 1 (1 pound) loaf soft raisin bread, torn into small pieces
 3 eggs, lightly beaten
 2 cups white sugar
 3 teaspoons vanilla extract
 1/2 teaspoons ground cinnamon

 Butter Pecan Sauce
 1/2 pound unsalted butter
 1 cup heavy cream
 1 cup brown sugar
 1/2 cup chopped toasted pecans

Preheat oven to 325 degrees. Coat a 13x9-inch baking dish with 1/4 cup melted butter.
Pour half and half and milk over bread in a large mixing bowl; let soak for 10 minutes before gently stirring. Stir eggs into the bread mixture until incorporated. Add sugar, vanilla extract, and cinnamon, stirring each addition into the mixture before adding the next. Spoon bread mixture into prepared baking dish.
Bake in preheated oven until bread mixture is firm and pudding-like, about 50 minutes or more until the bread appears firm.

BUTTER PECAN SAUCE
Stir 1/2 pound unsalted butter, heavy cream, and brown sugar together in a heavy saucepan; bring to a boil. Reduce heat to low, stir pecans into the cream mixture, and simmer until the sugar is dissolved and the sauce thickens, about 5 minutes; pour over each serving or over entire pan depending on preference. Can be served with whipped cream or vanilla ice cream... ENJOY!!


Tuesday, September 30, 2014

Quick Easy 25 min Homemade Chili


This is a go to recipe for our family! We love chili but just flat out don't have the time to do all that soaking the beans etc that a traditional chili would take. This recipe is adapted from a cooking genius friend of mine who taught me a lot of domestic things in my earlier years whom will forever be thankful for!! 

Quick and Easy 25 min Chili
3lbs ground meat 
(we used chicken we had ground ourselves but hamburger or turkey works great too!!)
1 onion diced
2 cloves diced garlic or to taste
4 cans of chili beans undrained
1 15oz can of tomato sauce
2 TBS cumin or to taste
1/2 TBS chili powder or to taste
2 tsp liquid smoke
1/2 tsp chipotole powder
6 drops Tabasco or to taste
salt and pepper to taste
grated cheese for garnish

Brown meat with onion and garlic until meat is no longer pink and onion is translucent. Drain if it is needed. Add chili beans and tomato sauce. Add all seasonings to taste. :) Serve with a little cheese on top. PS this makes a huge pot,  Feel free to adjust the amounts to fit your needs.

Tuesday, September 16, 2014

Fancy Puff Pastry Deconstructed Chicken Pot Pie-Great for Entertaining!!

This is really a cool concept! The first time I saw this idea was at the Lion House Pantry. Unfortunately I have no idea what their recipe is but I really love how mine turns out! This is just my recipe for chicken pot pie filling and a great puff pastry square! It is great for serving at a party too! So much less complicated! 

Fancy Puff Pastry Deconstructed 
Chicken Pot Pie

Makes enough for 12 squares
2 sheets of puff pastry thawed
2lbs of chicken breast cooked and diced
1 Cup of sliced carrots
1 C peas
1 C sliced celery
2 potatoes peeled and diced
1 onion diced
1/3 C butter
1/3 C flour
1/2 tsp salt
1/2 tsp pepper
1 tsp thyme
2 C chicken broth
1 C milk

Preheat oven to 400 degrees and line a pan with parchment paper. Cut your puff pastry sheets into 12 squares and place on the parchment. Place the carrots celery and potato in a sauce pan and cover just barely with water. Bring to a boil and let simmer for approx 15 min or until the veggies are fork tender.Drain. Meanwhile, melt the butter in another sauce pan and onion and saute until the onion is translucent.  Stir in flour, salt, pepper, and thyme. Slowly stir in chicken broth and milk. Simmer over medium-low heat until thick. Remove from heat. Mix milk mixture and veggies together.  Add the peas and the chicken. Allow to heat through. Place the puff pastry in the preheated oven and cook until the pastries are golden and puffed. 15-20 min approx. 


 Once the pastry squares have rested about 5 min. place one in an individual serving dish and ladle the chicken pot pie mix over the top with the desired amount of "gravy". Enjoy!! 

PS wouldn't it be cool if we cut the pastries out in fun shapes too!

Loves,
Emily

Wednesday, August 20, 2014

Bean and cheese Burrito Sour Cream Enchilada Casserole! SO Easy!

This is one easy peasy casserole! It literally took me 11 minutes to get in the pan and cooking! Yes, I time myself. It took longer for the oven to preheat. Serious easiness here! It was actually requested by my now 17 year old son for his birthday dinner if that gives you any indication as to if it is as yummy as it sounds. Also for my gluten free friends and family I You can make it with corn chicken taquitos (please read the label to be sure if your brand is gluten free) and it is just as good if not better. I literally decided to try it while shopping for the ingredients for the bean burrito style and it was amazing! I think I like the taquito version better!!

Bean and Cheese Burrito Sour Cream enchilada Casserole
14 bean and cheese frozen burritos thawed (enough to cover the bottom of your pan)
1 family size cream of mushroom soup
16 oz sour cream
7oz green chilies
12.5 oz canned chicken un-drained(optional)
2 cups of cheese

Line the pan edge to edge with your burritos
Mix remaining ingredients except cheese together and pour over the burritos. Top with cheese. Cover with foil and bake for 1 hour in 350 degree oven. 

For the taquito version you will want to add a little sauce to the bottom of your pan first.

Wednesday, July 9, 2014

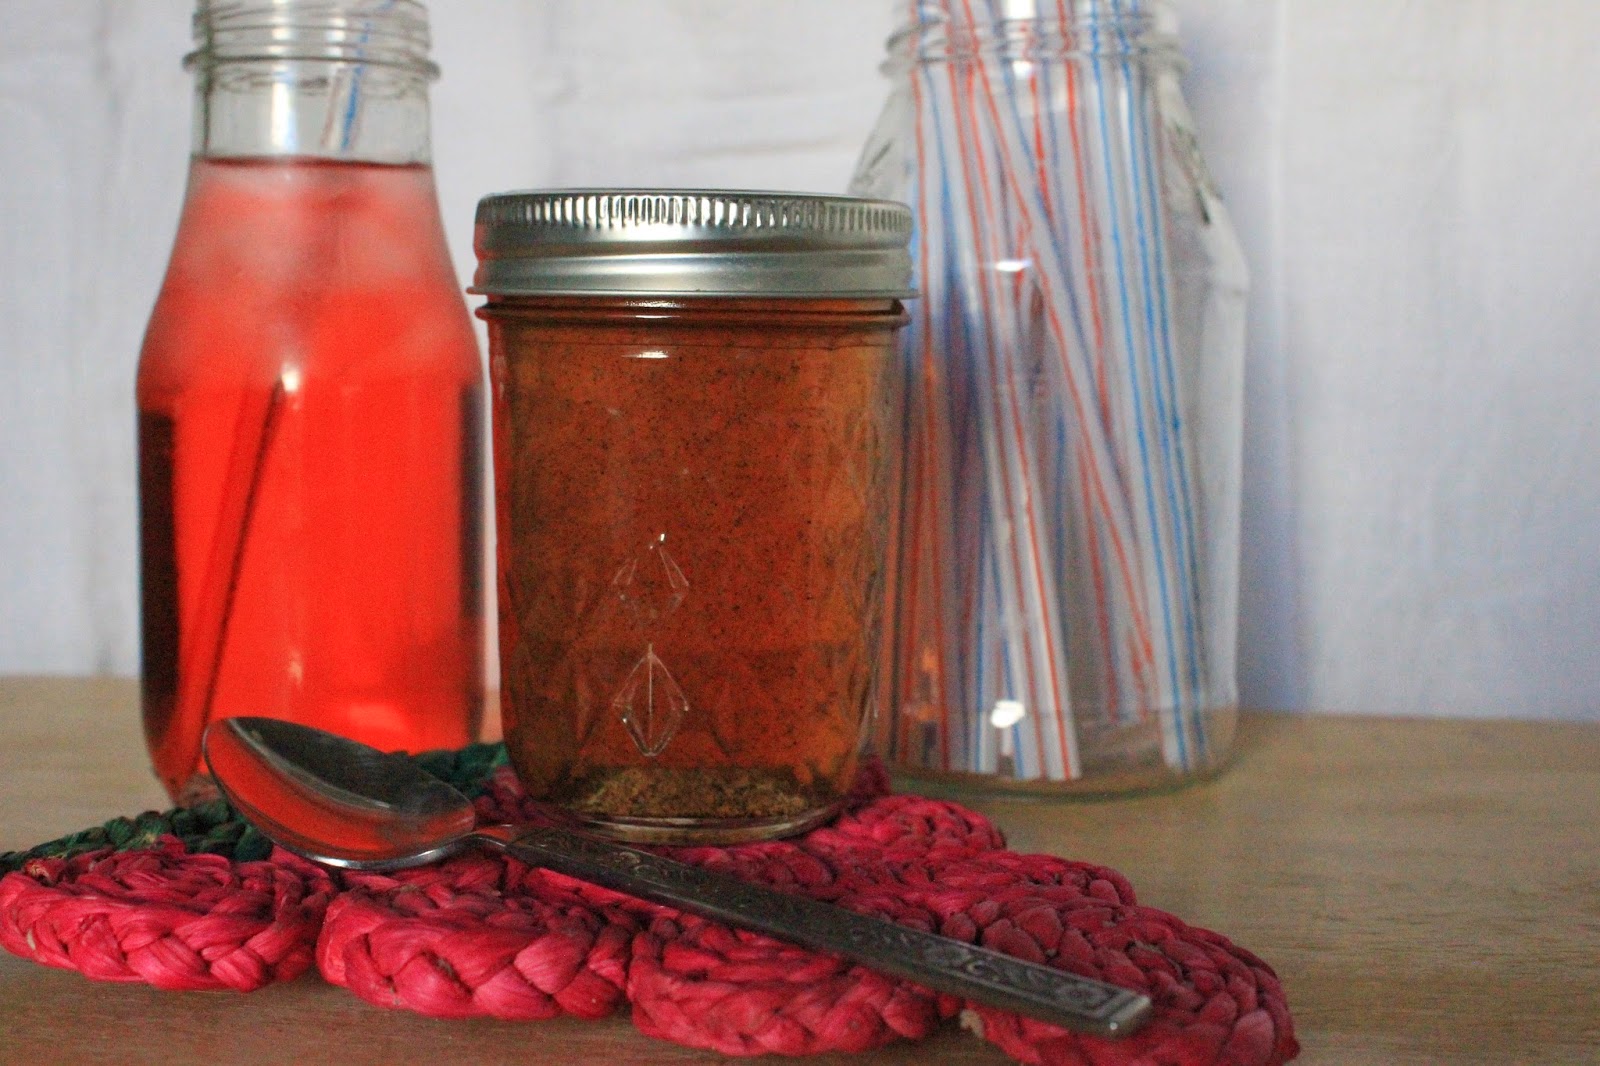
Vanilla Simple Syrup

I have a simple and quick recipe today. Vanilla simple syrup. Simple syrup can make a big difference in the recipes you make. I mostly use it for tea and cocoa. It can also be used in cocktails and mocktails. It is a great way to sweeten and add a little oomph of flavor to iced tea because it doesn't need to dissolve. No more sugar crystals at the bottom of your sun tea jar! Simple syrup is crazy easy to make and in my opinion it is totally worth the 20 minutes it takes to cook up.

Look at those lovely brown flecks!


Vanilla Simple Syrup

1 cup sugar
1 cup water
1 1/2 teaspoon vanilla bean paste

Combine sugar and water in a small saucepan. Add vanilla. Cook over medium heat until it comes to a boil. Boil 10-15 minutes. Cool and store in airtight container. Keeps for one week in the fridge. Enjoy!


One comment: you can use vanilla extract instead of pure vanilla bean paste. I would encourage using the paste. Emily and my mom turned me on to vanilla bean paste and holy bananas! It is good. I admit that in baked goods I can't tell the difference between the paste and the extract. However in something like the simple syrup you can taste the difference. Plus I love the color and the vanilla flecks in it. 

Tuesday, July 8, 2014

Freezer Breakfast burritos (great for camping!!)

I don't know about you but my summer mornings are meant to be slept through. HAHA!! Unfortunately, they mostly don't get to be BUT I can still hope and try right?? When I do manage to sleep/get my way I like knowing that my children who prefer to get up instead of sleeping (WHAT??) have something they can eat for breakfast that isn't cold cereal or pop tarts. Enter Freezer Breakfast Burritos!! 

Freezer Breakfast Burritos
18 Eggs
2lbs Sausage
 1 Yellow Onion
3 Cloves Garlic, minced
4-6 chicken bouillon cubes
12 Med. Potatoes, chopped
4 Cups Cheddar Cheese, shredded
24 Tortilla Shells
 Salt & Pepper to taste
 Foil for wrapping
Optional: Salsa and extra cheese  

Chop potatoes and boil with bouillon cubes until soft. Crack eggs and cook over low heat until you have soft, scrambled eggs.  Salt and pepper to taste. Meanwhile Saute sausage yellow onions and garlic in 2 T. olive oil until fragrant and cook all the way through and no longer pink.  In large bowl combine Sausage mixture, scrambled eggs, drained and squashed a smidge potatoes,  cheese, and Salt & Pepper.  Divide ingredients into 20-24 tortilla shells.  Roll and wrap in tin foil -- freeze. ready to unwrap and microwave for a soft shell or fry in butter for a crisp shell or throw on the fire. Serve with salsa and extra cheese if desired. (makes 20-24 burritos)
ENJOY!!

PS they were absolutely amazing for camping!! I just put the frozen still wrapped burritos over the fire and they were great! AND they helped keep things frozen and cold also! WIN WIN!!

Monday, June 23, 2014

French Fry Pizza

I keep telling myself that I am going to start eating healthier. It is a constant reel going on in my head. But then, oh but then, something like this happens:


French fry pizza!!!!!!! Those exclamation points are really necessary because this bad boy is awesome! It is definitely a once in a while treat. Let me tell you first hand that it is worth the calories. The crunch of the crust and the cheesiness of the cheese and the yum of the fries...... It is a thing of beauty. We used cheese pizza but I am sure that it would be great with other kinds. The cheese seemed to help "glue" it all together however. We also used shoe string fries because really that seemed logical. Steak fries seemed like they would be a little too hefty. Plus I can't ever seem to get the crinkle ones crispy. So on to the recipe? Like that is really necessary but here we go! 


French Fry Pizza

1 Digiorno Pizzeria style cheese pizza
1/3 bag Ore Ida frozen shoestring fries

Bake up the french fries to the longest time given on package instructions. Layer hot fries on top of frozen pizza. Bake according to longest time on pizza package instructions. Pull out of oven and let cool for a few minutes. Cut up and enjoy! 


Really you can use any fries and any pizza. I really loved that specific Digiorno pizza because of the extra herbs and spices on it. And the fries crisped up and then melded really well with the pizza. Don't expect the fries to be crisp on the pizza though because they really aren't. The pieces that are hanging off the edge and up in the air will be! Crunchy little surprises. The pizzas instructions said to put the it right on the oven rack which would probably make it even more crisp but I didn't want fries falling off and starting on fire in the bottom of the oven so we went the safe route and put it on a pan. I am sure it would be delicious and just fine right on the rack.