Pages

Showing posts with label easy recipe. Show all posts

Monday, July 20, 2015

Epic Pizza Cake! A great party food-Semi homemade

Hey friends! Looking for an amazing party food! Check this out! 
Share it if you love it please?
Loves
Emily 

Thursday, March 19, 2015

Laffy Taffy Pie (with a secret ingredient)


If you are looking a really fast easy versatile pie this is your huckleberry! I don't remember where I found this recipe years ago and my children renamed the pie Laffy Taffy Pie because...It tastes like a Laffy Taffy!! AND Guess what!  Its secret ingredient is unsweetened Kool-Aid!! COOL!!  
Try it! You will love it! 
This one was made with strawberry kool-aid but we have also tried grape and orange etc. (orange was divine too!! Like a creamcicle!) 

Laffy Taffy Pie
1 9 inch graham crust or you can make a homemade version
1 can of sweetened milk
1 8oz container of cool whip
1 pkg of unsweetened kool-aid

Mix sweetened condensed milk, cool whip and kool-aid together. Pour into the crust. Chill for a few hours before serving. 


LOVES
Emily

Tuesday, March 10, 2015

Crepes-Or Roll up pancakes


When I was a little girl my mom would make what we called "Roll Up Pancakes". 
I was much older before I discovered that the rest of the world called these tubes of goodness crepes. 
Crepe is a french word which means food that will make you think you have died and gone to heaven. 
I have passed the love of roll up pancakes/Crepes onto my kids too. They love them as much as I do!  
We have been known to eat these babies for dinner and they are occasionally requested as a birthday dinner. 
Yes. 
Seriously. 
This is one of those quadruple the recipe kinda recipes. 
The awesome thing is that they are very budget friendly and beautifully simple.  They are also a blank canvas waiting to be filled but we purest people here love just butter and powdered sugar. Its the way my mama filled them for me of course!!

Crepes
Makes 8 (but in our house we x4.)
4 eggs, lightly beaten
 1 1/3 cups milk
 2 tablespoons butter, melted
 1 cup all-purpose flour
 2 tablespoons white sugar
 1/2 teaspoon salt

In large bowl, mix together eggs, milk, melted butter, flour sugar and salt until smooth.
Heat a medium-sized skillet or crepe pan over medium heat. Grease pan with a small amount of butter. spoon 1/4 to 1/3 C of crepe batter into hot pan. Cook over medium heat, 1 to 2 minutes on a side, or until golden brown. Fill as desired and serve immediately.


Loves 
Emily


Monday, March 9, 2015

Quinoa Breakfast Cereal


You know what I just discovered? Quinoa breakfast cereal! Lately, I have been trying to trick myself into eating healthier without dieting. Dieting sucks. So in an effort to be more conscious of my eating I decided to try quinoa as a breakfast cereal. And guess what? It is awesome. Like truly! All those pinners are not lying. It is good with sugar or without. I like it with all kinds of fruit. With or without butter. I simply prepare it like I would prepare oatmeal. It is tasty for sure but it is also very healthy for you. Quinoa is an amazing little grain. It is full of fiber and protein. Which means that it will also keep you full until lunch. Plus it cooks up crazy quick. Faster than rice even. Give it a try peeps!

Peace out- AnneMarie

Monday, February 16, 2015

Chocolate dipped strawberries


We made some traditional chocolate dipped strawberries this weekend. I love that they are a treat and are a little bit on the healthy side too and it is so much less expensive than $3 a piece if you buy them premade! Here's what we did...
1 bag of milk chocolate 
(you can use semi if you prefer)
2 TBS canola oil
1 lb of strawberries

Melt the chocolate and the oil a double boiler over low heat. Dip the strawberries in in the chocolate and place on parchment paper or wax paper and let rest until the chocolate is dry.

 NOTE: You can actually get more like 2 lbs of strawberries out of 1 bag of chips as you can see by the marshmallow brigade. LOL! 


Monday, February 2, 2015

Maxed Out Blondies! A semi homemade recipe


I will be the first to admit that I have a love of a good brownie. (or blondie in this case) Especially the fancy more than the norm brownie.  Here is a recipe that fits the bill! It has a cheesecake layer, a marshmallow layer and chocolate chips! How can one go wrong?? We served these babies at our superbowl party but the would be great for a Valentines Day dinner...who are we kidding they will be awesome for any occassion. RIGHT?? PS don't let the blondie word trick you...there is plenty of chocolate to be had in these wonderful bars!!
Maxed Out Blondies
Blondie base
1 pouch of your favorite chocolate chip cookies mix (approx 17.5 oz)
1/4 cup melted butter
2 tablespoons water
1 egg
Filling
1 package (8 oz) cream cheese, softened
1/2 cup granulated sugar
1/4 cup butter or margarine, softened
2 tablespoons Gold Medal® all-purpose flour
1 teaspoon vanilla
1 egg
1 cup milk chocolate chips (6 oz)
2 cups miniature marshmallows 
Chocolate Glaze
1/4 cup butter or margarine
1/8 cup unsweetened baking cocoa
2 ½ tablespoons milk
1 1/2 cups powdered sugar
1/2 teaspoon vanilla

1. Heat oven to 350°F. Line a 9x13 pan with parchment paper or spray with non stick pan spray
2. Mix up your cookie mix according to the directions and smooth dough in bottom of pan. Set aside.
3. In large bowl, mix cream cheese, sugar, 1/4 cup butter, the flour, 1 teaspoon vanilla and the egg with electric mixer on medium speed until smooth. Spread over cookie dough base. Sprinkle with chocolate chips.
4. Bake 26 to 28 minutes or until filling is set. Sprinkle evenly with marshmallows. Bake 2 minutes longer. Cool for 30 minutes on a cooling rack.
5. In 2-quart saucepan, melt 1/4 cup butter over medium heat. Stir in cocoa and milk. Heat until starts to thicken. Remove from heat. With wire whisk, gradually stir in powdered sugar until well blended. Stir in 1/2 teaspoon vanilla. Immediately drizzle glaze over brownies.
6. Refrigerate about 2 hours or until chilled before cutting and serving


Thursday, January 15, 2015

Orange Honey Butter

Have you ever had Indian Fry bread? Or what Utahns call scones? It is just fried dough. Like thin stretched out bread dough that has been fried to golden perfection but whatever. We love it around our house. Even the kids eat it up. There are crazy easy to make too. As a matter of fact all I do when I make them is use rhodes rolls that have been thawed. No bread dough making for me! The best thing about them is that they are a blank slate. You can use them for something more filling like navajo tacos or just sprinkle them with some powder sugar.  


For a fun twist I made some orange honey butter. Holy bananas it was delicious! 

Orange Honey Butter

1/4 C butter, thawed to room temperature
1-2 Tbsp powdered sugar
1-2 Tbsp honey
6-8 drops doterra wild orange oil
1-2 tsp vanilla paste

Whip honey and butter until pale in color. Add sugar, orange oil, and vanilla paste and whip until well combined and a consistency that you like.


So all my measurements are to your taste. Some people like it more sweet, others like it less sweet. We liked it sweet. Make sure your butter is really room temperature. If it isn't room temperature the butter and honey have a hard time combining. 

Peace Out!- AnneMarie

Tuesday, January 6, 2015

Lets make Ranch Mix for less than 25 cents a pack!!


Hello my friends! I hope you have enjoyed your Christmas break as much as we did here at our house! The time was spent being and doing everything family and it was truly a joy! 
AND 
one of  the highlights of the season is the exciting news that our 2nd daughter Lindsay has accepted the proposal of her one and only beloved, and will be getting married on April 25 2015!!
 YAY!! 
(be on the look out for wedding posts) 
BTW we LOVE her man something fierce!! He is a wonderful fit for our family and can't wait for their union so that Matt will be an official member of the family!! When you hear people say "you are not loosing a daughter you are gaining a son" cant be more true in this case! Jason and I are very lucky that both of our girls have chosen wonderful sons for us and pray that the 3 remaining children pick some equally great people to join our family!
  WOOT WOOT!! (I am just a smidge excited!!!)
And now.... back to the blog...HAHAHA!!


As I have been reflecting on things I would like to improve in my life and "setting" resolutions for myself one thing that rings true to me is that I'd like to be a better steward of our money. Now, don't get me wrong we have very little debt and we are doing "ok" in the money dept but I would really like to save more, and be able to help more whether its our kids, friends and family when they find themselves in those situations when money can solve the problem. I hate having to say I wish there was something I could do...I would really enjoy being able to actually help. SO....I will be looking for ways to cut the budget to allow us to pad the savings account. Here is my very first money saving discovery!
 DIY Ranch mix! 
(yes we eat far too much of the stuff)
This recipe is a fraction of the price, easy to put together and is sans the preservatives and additives. Silver linings folks!


DIY DRY RANCH MIX
This is enough to equal one packet. Needless to say you can double, triple, quadruple etc it as much as you like. I like just doing one batch at a time so the seasonings are evenly distributed)
3/4 tsp pepper
1 tsp kosher salt
1/2 tsp garlic powder
1 tsp dry minced onion (or 1/2 tsp onion powder)
1 pinch thyme
1/4 tsp dill weed

Mix and use as you would a dry ranch mix packet. PS I put it in little containers to avoid wasting baggies. More tiny money savings and hey...it helps the earth a little too. :)


Thursday, December 18, 2014

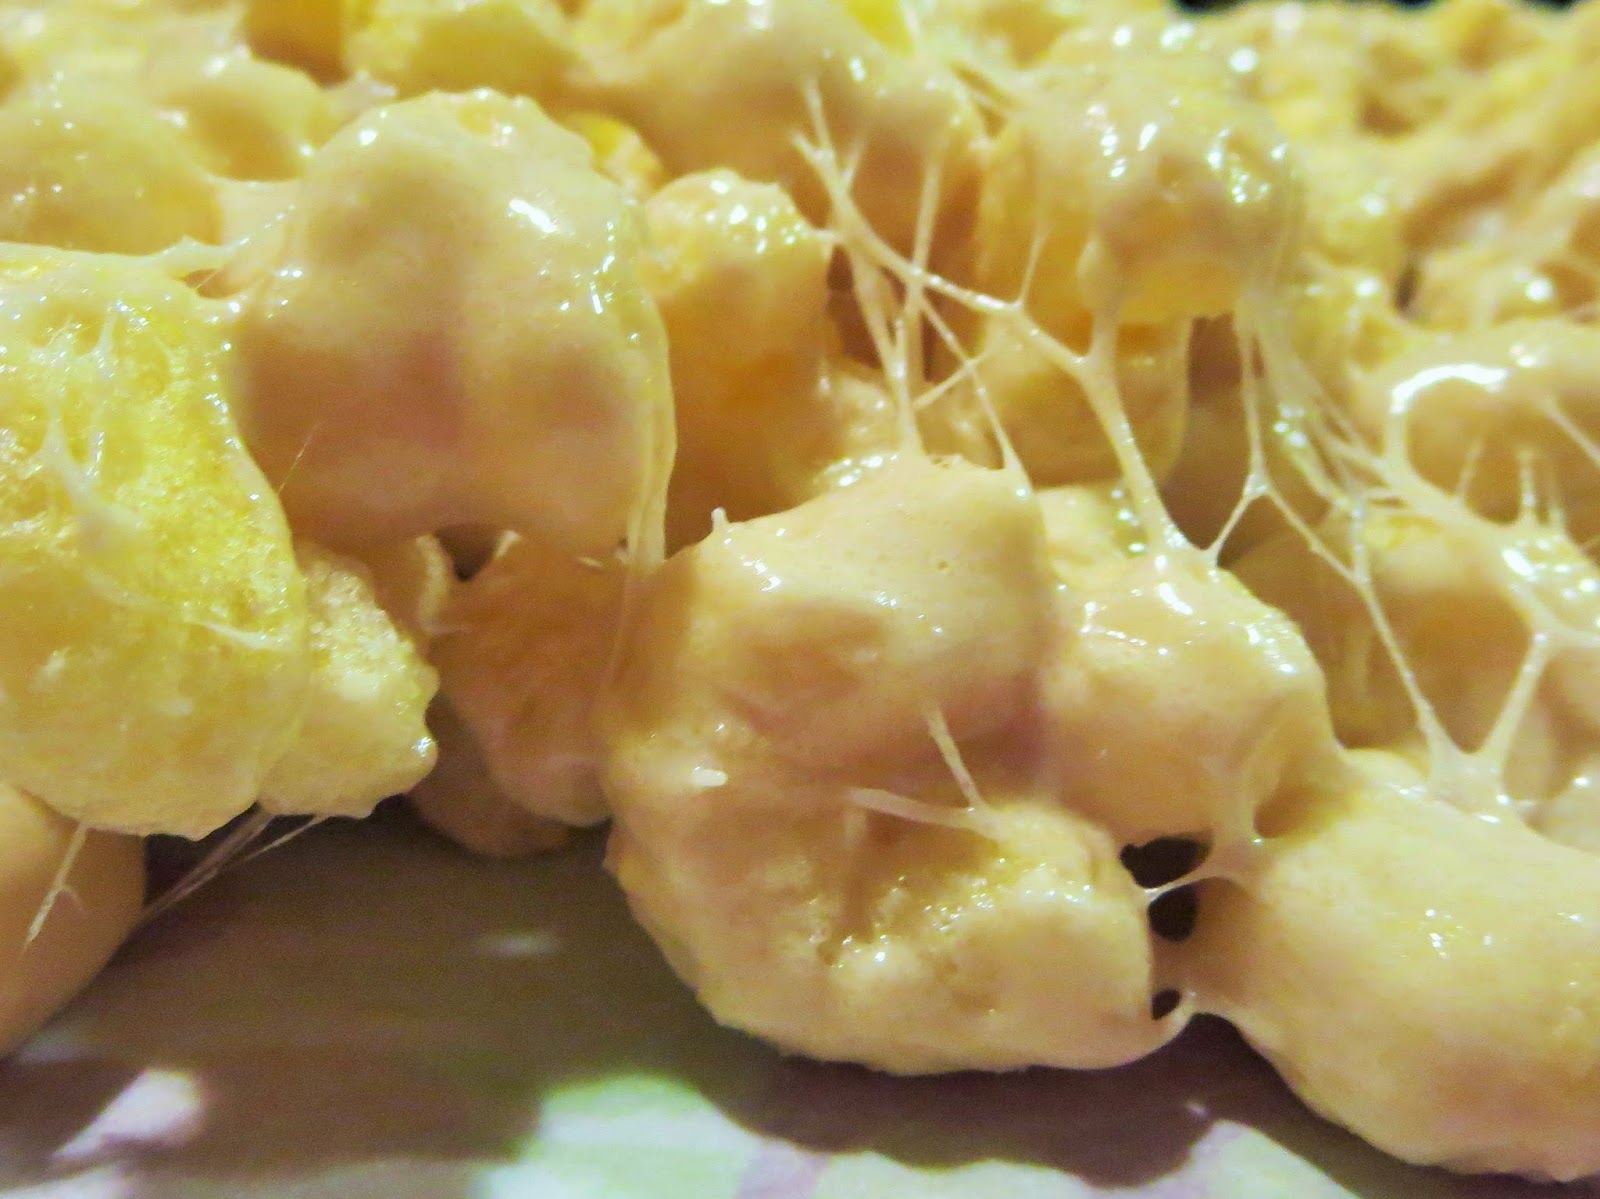
Salty Sweet Gooey Corn Puff O' Wonder


This is one yummy recipe!! It is the perfect combo of salty and sweet and gooey and we love it around here! 

SALTY SWEET GOOEY CORN PUFF O'WONDER
12 C Corn Puffs or pops (you can always use microwave buttered popcorn too. If you chose to do this do your best to sift out the un popped kernels)
1 stick of butter
1 C packed brown sugar

Lay some parchment paper out either on your table or on a jelly roll pan or cookie sheet. Measure out your puffs into a large mixing bowl. In a large sauce pan, melt the butter.. Add the brown sugar and stir until combine with the butter. Add the marshmallows to the butter mix and stir until melted. Pour into the puffs and mix until all the puffs are covered. Dump and spread out onto the surface you have prepared. 


(NOTE: if you did not use parchment paper be sure to lightly spray with a non stick pan spray to prevent the puffs from sticking) Allow to cool (if you can) and enjoy!! 


Wednesday, December 17, 2014

Caramel Pretzel Magic Cookie Bars

Every year our family does a treat exchange at our Bitner Family Christmas party. The basic gist of it is that you make a plate of treats for every family to take home with them. Then you have a bunch of yummy treats to celebrate your holiday without the fuss of having to make them all. I love it! It is like getting to take the party home with you. Not too mention all the goodies. Oh the goodies! 

This year I was going to do a bag of our favorite frozen potstickers from costco- easy peasy but then I saw these bars. So I decided to try and make them on a whim. Best whim ever! They are buttery and sweet and salty and caramely. Oh baby! They are crazy easy to make too. So now these are a serious contender for our treat exchange. I typed up the recipe because I slightly adapted the original recipe. I added nuts. Thats it! HA!


Caramel Pretzel Magic Cookie Bar

6 tbsp butter, melted
1 1/2 C graham cracker crumbs
25-50 pretzels
1 14 oz can sweetened condensed milk
1 C pecans, chopped
1 C semi-sweet chocolate chips
1 C sweetened coconut flakes
1 C caramel bits

Preheat oven to 350 degrees. Put the can of sweetened condensed milk in a bowl of hot water to help it pour easily. Do not pour it into bowl-leave in can!! Mix and press graham cracker crumbs and butter in a 9x13 pan. Pack down firmly. Drizzle half of the can of sweetened condensed milk over crumb crust. Layer pretzels tightly over sweetened condensed milk. Sprinkle pecans, chocolate chips, coconut flakes and caramel bits over the pretzels evenly. Pour the remaining sweetened condensed milk over the top. Bake for 25 minutes or until slightly browned. Let cool completely before cutting!


They are awesome!

Monday, December 1, 2014

Crock Pot Pork Chile Verde

Did you have a happy Thanksgiving weekend friends? Mine was excellent! Lots of family time and lots of good food! Emily hosted our huge family thanksgiving meal this year and it was lovely. Smoked turkey? Um yes please. I also may have eaten an entire pumpkin pecan pie by myself. No shame. By Sunday I was over eating thanksgiving food though. That is where this recipe comes in. So if you are sick of turkey and mashed potato left overs check it out.


Pork Chile Verde 

4 pound pork picnic shoulder roast
2 onions, chopped
4 cloves of garlic, minced
4-8 serano chiles
1-2 bunches of cilantro
8-10 tomatillos
2 red tomatoes

Put roast, chopped onion and garlic in a 4 quart crock pot. Cook pork roast in a crock pot on low for about 8 hours or until it is easily shredded. Shred it all up and pour most of juices off. Steam tomatillos and serano chiles until slightly cooked. Blend tomatillos, serano chiles, cilantro and red tomatoes until liquified. Pour over shredded pork and enjoy!


We ate it on corn tortillas with some sour cream and queso fresco. The queso fresco is pretty salty so we don't add salt to our chile verde. Without a salty cheese the chile verde will probably need a little salt. We made this for 7 people and wanted leftovers so thats why we used so much meat. You can easily halve this. We were feeding people who don't enjoy spice so we only used 4 serano chiles. If we were making it just for us we would put at least 8 seranos in. Also I used 2 bunches of cilantro because we love it. This is one of my favorite crock pot recipes. It is delicious.

Thursday, November 20, 2014

Chicken Cordon Bleu Chowder-AND Bonus Parm Garlic Toast Recipe

This soup is good! So good my family horked it down like they were human hoovers! Most had 2 bowls and some ate 3. Its REALLY good! 

Chicken Cordon Bleu Chowder

1/2 C Butter
1/2 C Flour
2 1/2 C Half and half
2 1.2 C milk
2 chicken bouillon cubes broken
8 oz cream cheese
3 lb boneless chicken cooked and chopped
1 pkg pre cooked bacon cut to bite size 
1 C diced ham
8 oz swiss cheese grated 

In a large pan melt butter and then add the flour to make a roux. Cook for about a minute. Add the half and half, milk and the bouillon. Heat for a few minutes and then add the cream cheese. While continuously stirring, bring to a boil and add chicken, bacon. and ham. Take off heat and stir in Swiss cheese. Bring back to the stove on low heat and stir until cheese is melted.

BONUS RECIPE

This is a super quick alternative to garlic bread. Just broil and wah-la!!

PARM GARLIC TOAST
(All of the ingredients are to taste)

Bread
butter softened
garlic powder
Parmesan cheese

Preheat oven to broil. Line a pan (We used 10x15 jelly roll pan) with parchment if desired. Butter each piece of bread and cover the pan with it. Sprinkle the buttered bread with garlic powder and then sprinkle with Parmesan cheese. Broil until browned and bubbly. YUMMY!!

NOTE!! Dont forget to enter our give away for a $50 amazon card! HERE!!

Tuesday, November 18, 2014

Smores Pie-Quick and Easy Last minute No bake pie Recipe


This Pie is awesome! Very easy, very tasty and simple and no bake is always a plus when you are using the oven for so many other things this time of year.  My sweet Gabby made this one up for us and another for a family friend and it was marvelous! Give it a try!

Yummy S'more Pie
1 package of instant pudding 3.9 oz size
1 can 12 oz of evaporated milk
1 9 inch graham cracker crust
3 cups mini marshmallows
2 cups frozen whipped topping (cool whip style) thawed
1/2 C chocolate chips

Whisk 1 1/4 C evaporated milk and pudding mix in a bowl until blended and pour into the graham crust. Microwave 2 Cups of the marshmallows and 1/4 Cup evaporated milk for 30-45 seconds until smooth. Let stand for 15 minutes. Gently fold the whipped topping. SPoon over the the chocolate layer and smooth. Add 1 cup of marshmallows and the chocolate chips to the top and then refrigerate for 2 hours.  Once set using a torch to brown marshmallows. Serve and enjoy!!


Thursday, October 16, 2014

Mock Abalone-A family traditional Recipe

Do you know what Abalone is?? Let me tell you...:) it is the meat inside the shell that mother of pearl comes from. 
It looks like this...
after meat is removed


the meat 


the whole complete abalone

My husband Jason's grandparents (who lived near the ocean) would eat abalone occasionally but the price was and is still daunting! $70 to $105 a pound approx. A delicacy worth the price from what I understand although I have
 never had the privilege of eating it myself. 
(it may as well cost a million dollars at that price. I could afford it as easily LOL!)

Enter the invention of Mock Abalone...
Thank you Grandma Hill!
It is delish!
Do give it a try! 
You will love it and it tastes a lot like abalone with the price of good ol' chicken! YAY!


MOCK ABALONE
2 jars of clam juice
3lbs boneless skinless chicken (cut into strips or nuggets)
1 Cup masa herina
Oil for deep frying

Seasonings to your tastes and desires...We like to use seasoned salt, creole seasoning, garlic powder, onion powder, old bay, black pepper, etc etc. Whatever suits your fancy.


Instructions
Soak the chicken pieces in the clam juice for as long as you can preferably over night. When you are ready to cook, put the masa herina and the seasonings in a gallon size zip lock bag. Drain the juice away from the chicken and add the chicken to the masa mix.  Shake to coat. Let the chicken rest for a few minutes. Meanwhile heat your oil to 375. Place a few pieces in the oil and cook for about 3.5 minutes or until the internal temp reaches 160 degrees. Placed the cooked chicken on a plate or tray lined with paper towels to drain. Repeat the cooking until all the chicken is cooked. 
Enjoy!
Loves 
Emily


Wednesday, October 8, 2014

Pantry Bag Meal-Round 2

 
So here is another idea for our pantry bag meals. If you don't remember, these are the meals for those who don't have a freezer or freezer space but still want some ready to go dinners set aside for times when time is tight. 
Let me introduce you to 

Mexican chicken Soup. 
(I found it on pinterest of course)

It is SO good and guess what? It took ONLY 8 minutes to get it hot and ready to eat!! 
That is awesome!
 PLUS...only 160 cals per 1 cup measure serving!! 
Holy COW! 
Is this real life?? :)

Gather these ingredients in your bag for the pantry

1 (15 oz) can black beans, drained and rinsed
1 (15 oz) can garbonzo beans, drained and rinsed
1 (14.5 oz) can diced tomatoes, drained
1 (15 oz) can sweet corn, drained
1 (12.5 oz) can chicken breast, drained
1 (10.75 oz) can cream of chicken soup
1 (10 oz) can mild enchilada sauce
1 (14 oz) can chicken broth
1 (1 oz) packet taco seasoning

Write or attach these instructions to your pantry bag

Instruction Open and pour all ingredients into a large soup pot. Heat through. Serve with tortilla chips and cheese if desired.  


ENJOY!
Emily

Tuesday, September 30, 2014

Quick Easy 25 min Homemade Chili


This is a go to recipe for our family! We love chili but just flat out don't have the time to do all that soaking the beans etc that a traditional chili would take. This recipe is adapted from a cooking genius friend of mine who taught me a lot of domestic things in my earlier years whom will forever be thankful for!! 

Quick and Easy 25 min Chili
3lbs ground meat 
(we used chicken we had ground ourselves but hamburger or turkey works great too!!)
1 onion diced
2 cloves diced garlic or to taste
4 cans of chili beans undrained
1 15oz can of tomato sauce
2 TBS cumin or to taste
1/2 TBS chili powder or to taste
2 tsp liquid smoke
1/2 tsp chipotole powder
6 drops Tabasco or to taste
salt and pepper to taste
grated cheese for garnish

Brown meat with onion and garlic until meat is no longer pink and onion is translucent. Drain if it is needed. Add chili beans and tomato sauce. Add all seasonings to taste. :) Serve with a little cheese on top. PS this makes a huge pot,  Feel free to adjust the amounts to fit your needs.

Wednesday, September 24, 2014

Pantry Bag Meals-A freezer Meal For those who don't have a freezer


I love a good freezer meal. I enjoy the peace of knowing that dinner is planned, prepared, and ready to go! What if one does not have a freezer or freezer space? No worries! There is a solution...
Pantry Bag Meals. 
This method only requires the space for the pre-cooked meat in the freezer and then when its time for dinner the rest of the ingredients are set a side ready to go. Just follow the simple instructions heat and eat. COOL!!  I have 12 recipes developed so far and 2 to share with you today. 

First is 
Taco Soup
Shopping list

1 lb hamburger or turkey burger
 1 onion, chopped
 1 (16 ounce) can chili beans, 
 1 (15 ounce) can kidney beans 
 1 (15 ounce) can whole kernel corn, 
 1 (8 ounce) can tomato sauce
 1 29oz can peeled and diced tomatoes
 1 (4 ounce) can diced green chile peppers
 1 (1.25 ounce) package taco seasoning mix

What to do

1. Precook the burger and onion drain and put in a freezer safe container and freeze.
2. Gather the canned goods and put in a bag or a different container of your choice
3. On the outside of the bag/container write or staple a printed sheet with these instructions....
Add 1 lb burger w onion from the freezer in a soup pot
Mix all the ingredients from the bag in with the burger, (do not drain the cans) add 2 cups of water. Heat through and eat!! 

(BTW we love to eat this soup with crushed tortilla chips and a little cheese sprinkled on the top)

The second is 
Hearty Bean Dip
(this recipe makes a great dip for chips or a filling for tortillas. Don't let the word Dip confuse you. It is hearty enough to make a meal. I promise.

Shopping list
1 lb burger
1 jar of your favorite salsa
1 large can of refried beans
1 lb cheese
Corn chips or tortillas or both :) 

PS the cheese, corn chips, and tortillas do not need to be purchased until you are ready to eat the recipe

1. Precook the burger, drain, and put in a freezer safe container and freeze.
2. Gather the canned goods and put in a bag or a different container of your choice
3. On the outside of the bag/container write or staple a printed sheet with these instructions....

Place 1 lb burger from the freezer in a pot, add salsa and beans and cheese from the fridge. Heat through. Serve with extra cheese sprinkled on top and corn chips or tortillas as a filling. 


These babies are going to waiting and ready for my family this coming holiday season! I've got 10 more recipes to get ready for my pantry and for you to see! Be watching!

ENJOY!
Loves,
Emily